Lens + Film Emulation in Blender: A Look Inside Aidan Mattheus’ Compositor Nodes.
by Vicente C.
Published |
21
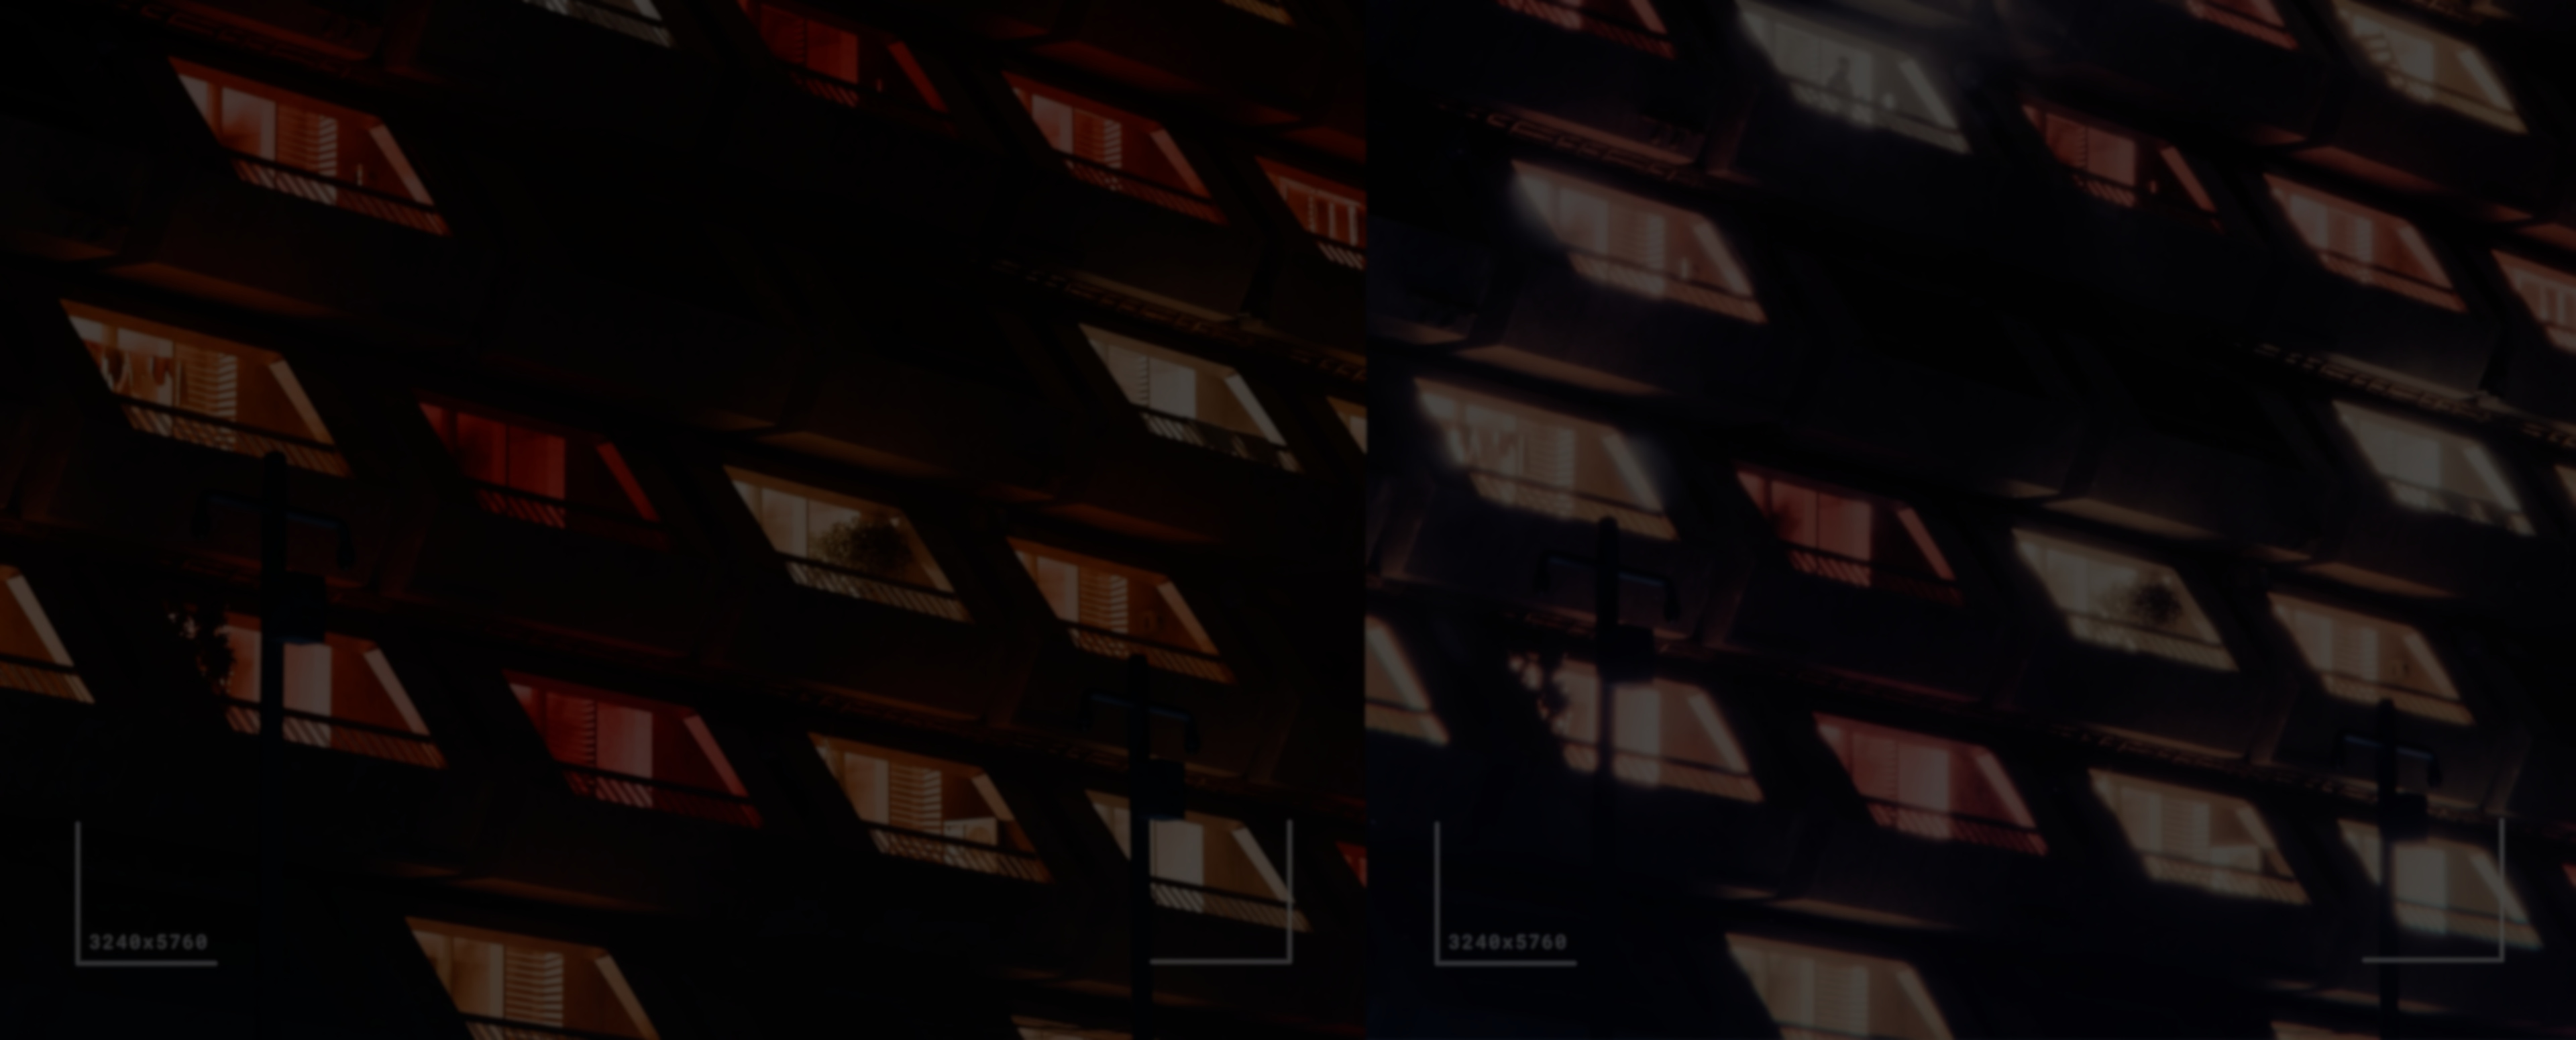
How can you recreate lens and film effects directly inside Blender’s compositor? Aidan Mattheus just released an updated version of their Lens + Film Emulation compositor nodes. It brings multiple effects together into a single setup, recreating things like lens distortion, halation, and film grain directly in the compositor.
After reaching out, Aidan shared more context on how the project evolved. What started as a smaller, more limited setup gradually grew in complexity, which led to a full redesign. With newer compositor tools available in Blender 5.0, the system was rebuilt into a more organized set of nodes that’s easier to work with and adjust.
From Experiment to Node System
The first version of this setup goes back over a year. It was originally built inside a more limited version of Blender’s compositor, with fewer tools available and a more fragmented structure.
Even in that state, it was already being used across multiple projects. Over time, as more effects were added, the setup became harder to manage. That’s what led to the redesign, breaking things into smaller pieces and making it easier to control.
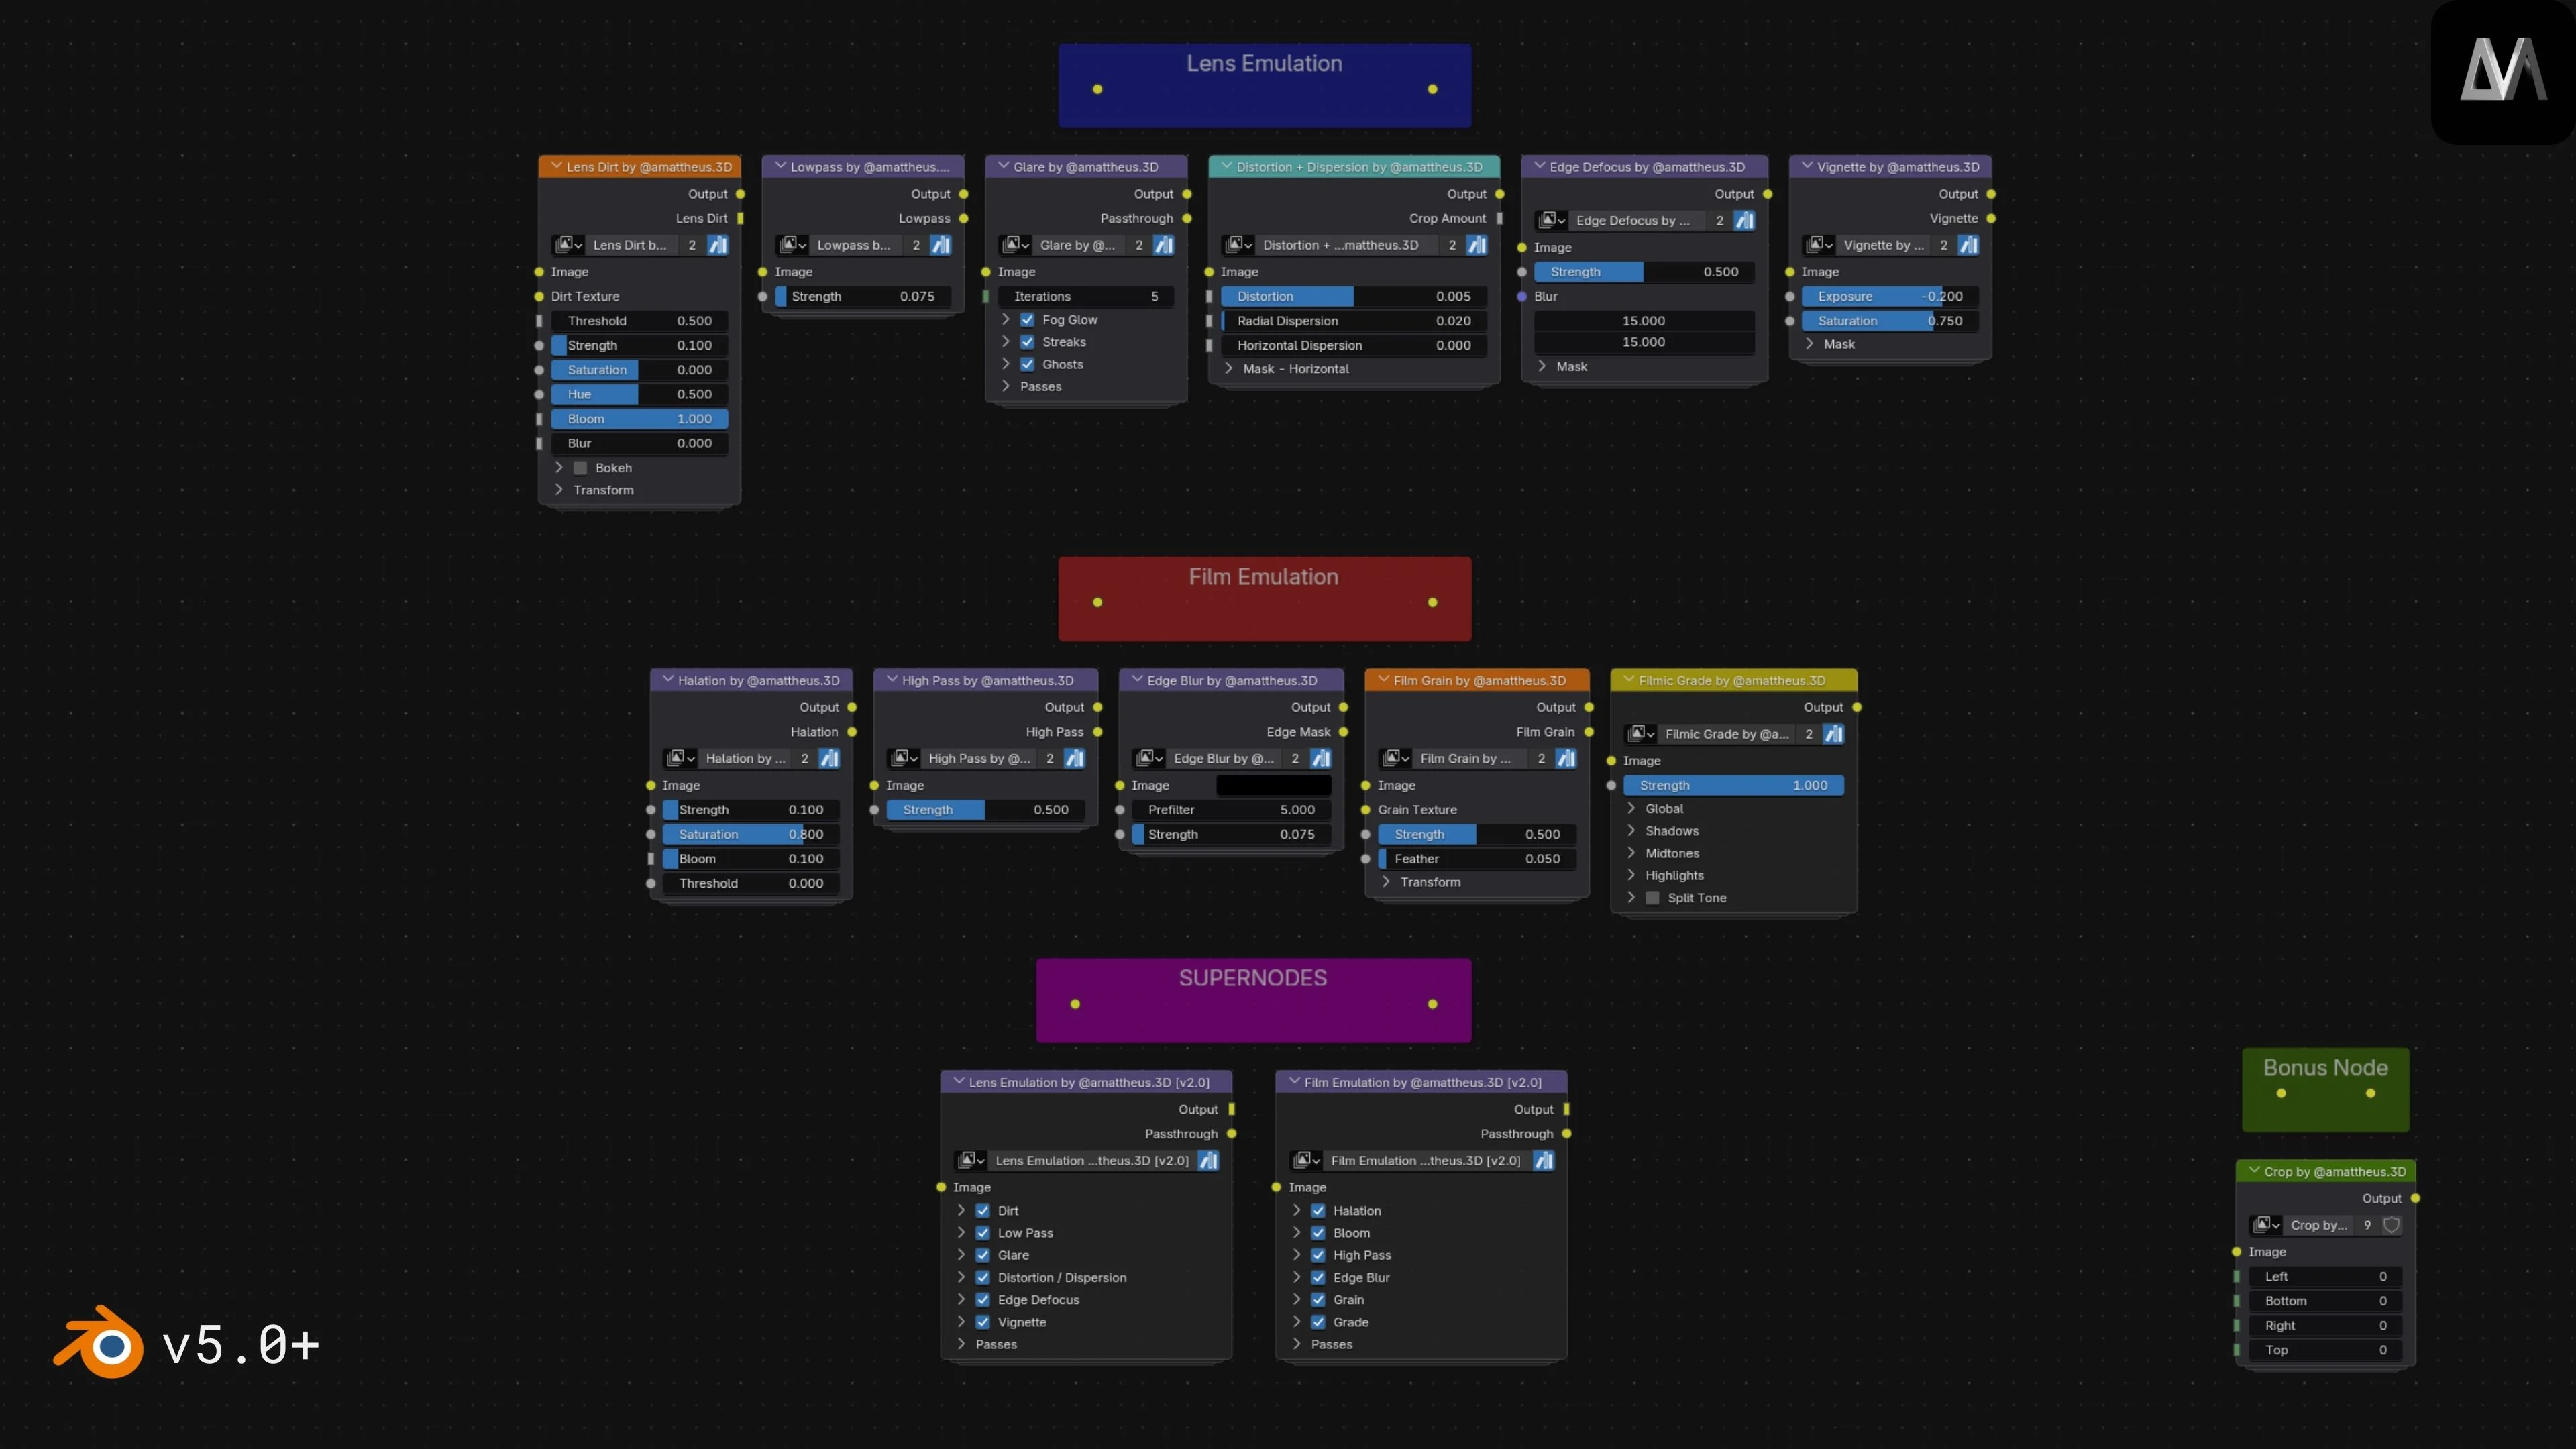
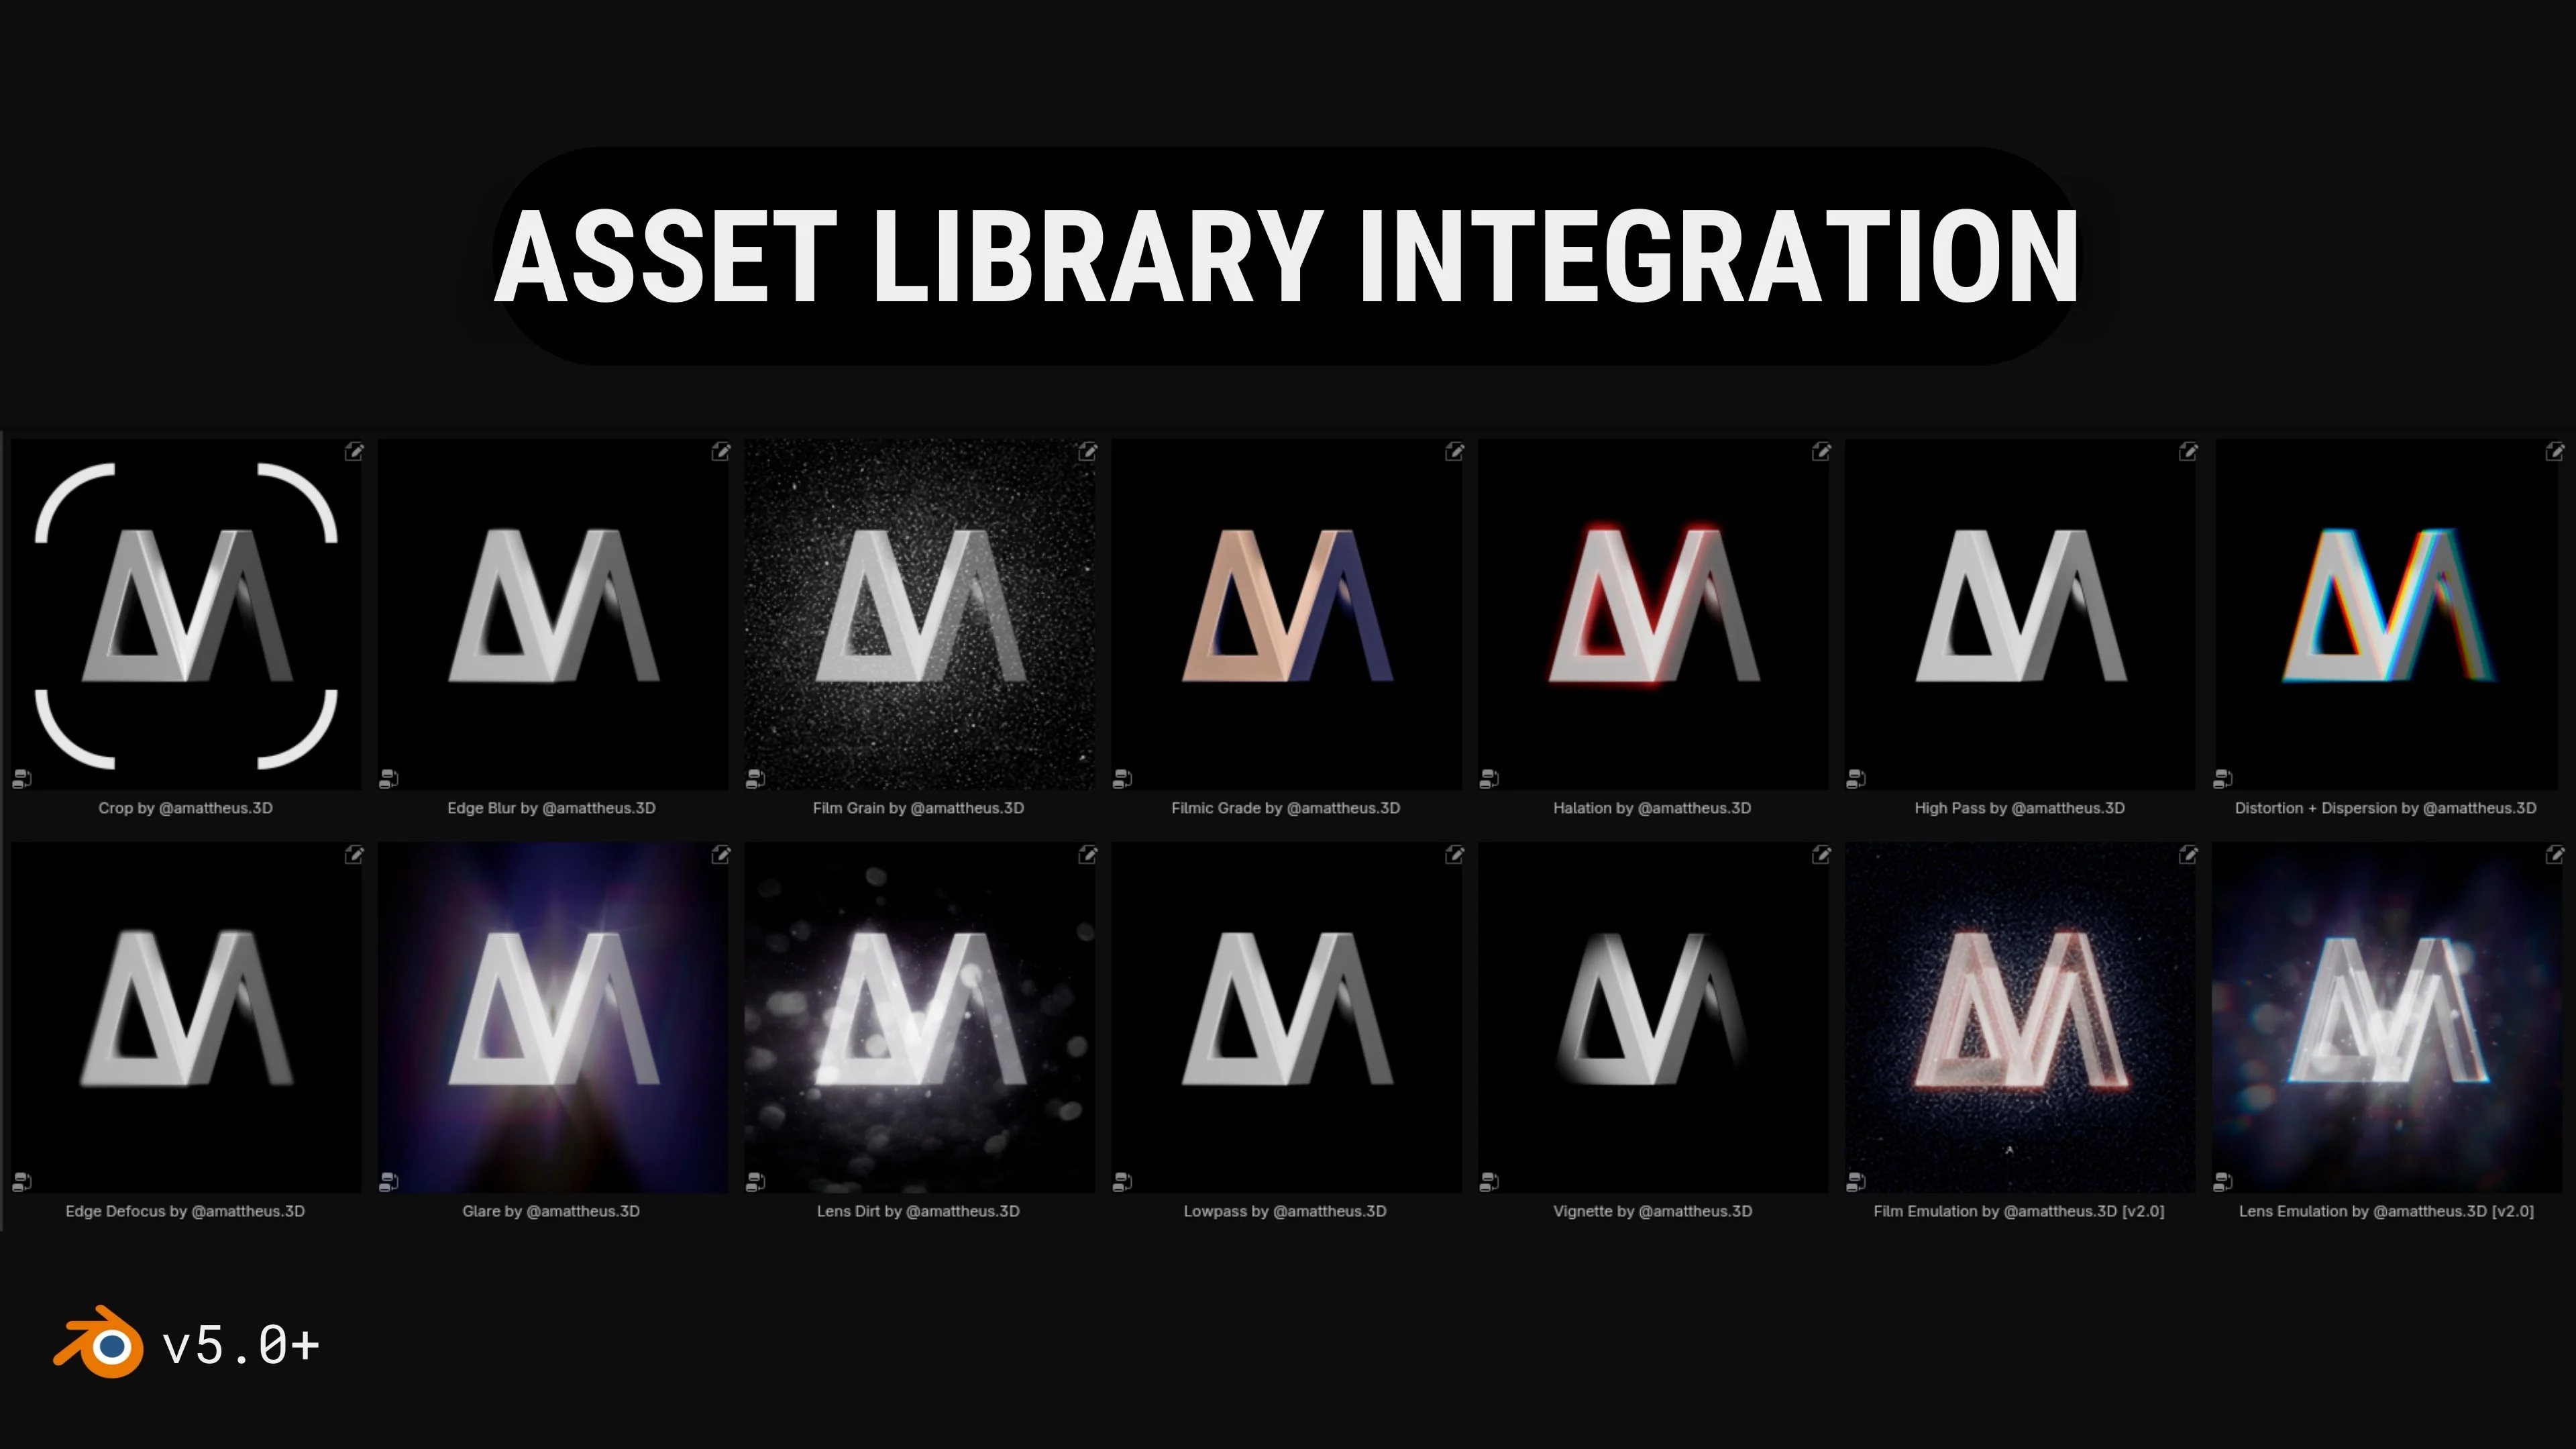
With Blender 5.0, the system was rebuilt using the compositor’s asset system. Individual effects were split into smaller nodes, while larger “super-nodes” bring them together into a single interface.
Breaking Down the Effects
The system is divided into two main groups: lens emulation and film emulation.
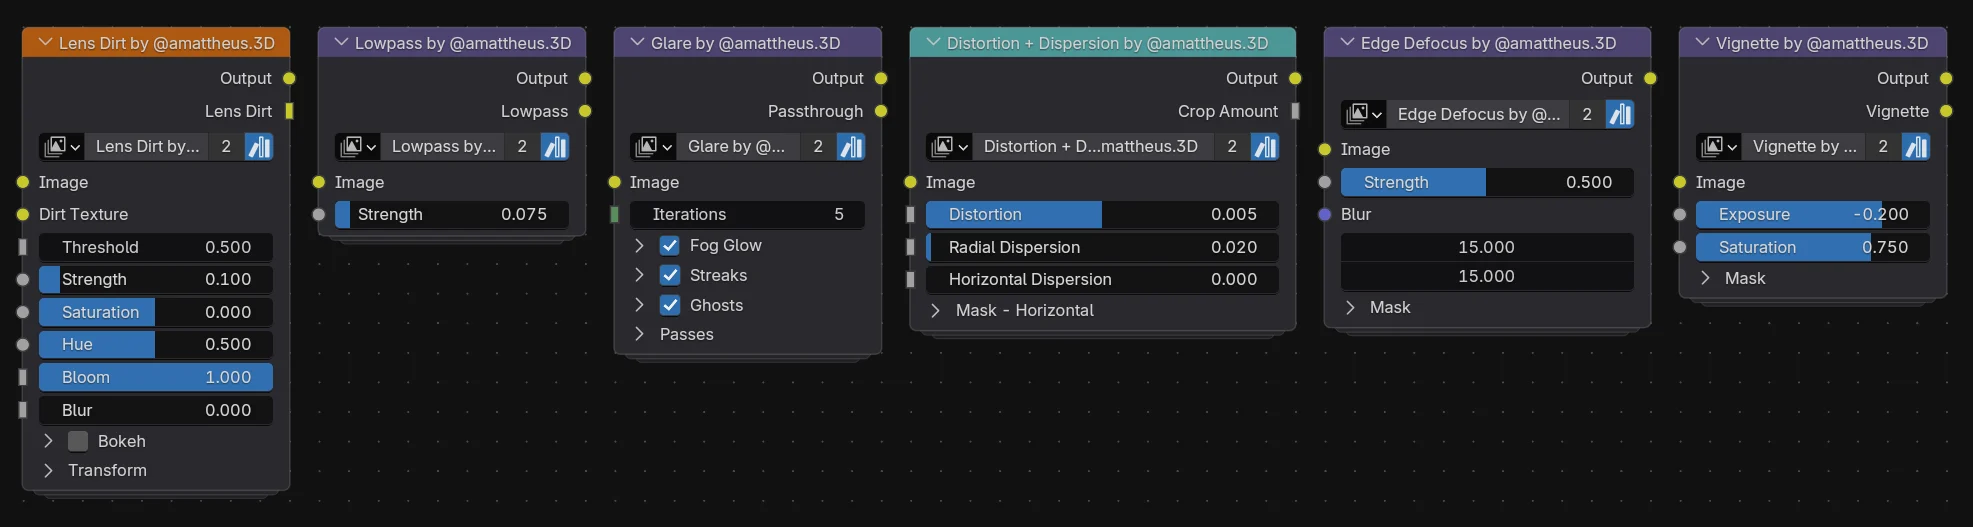
On the lens side, effects simulate how a camera behaves physically. This includes things like glare, distortion, vignette, edge defocus, and lens dirt. These are meant to affect how light interacts with the image before it reaches the “film.”
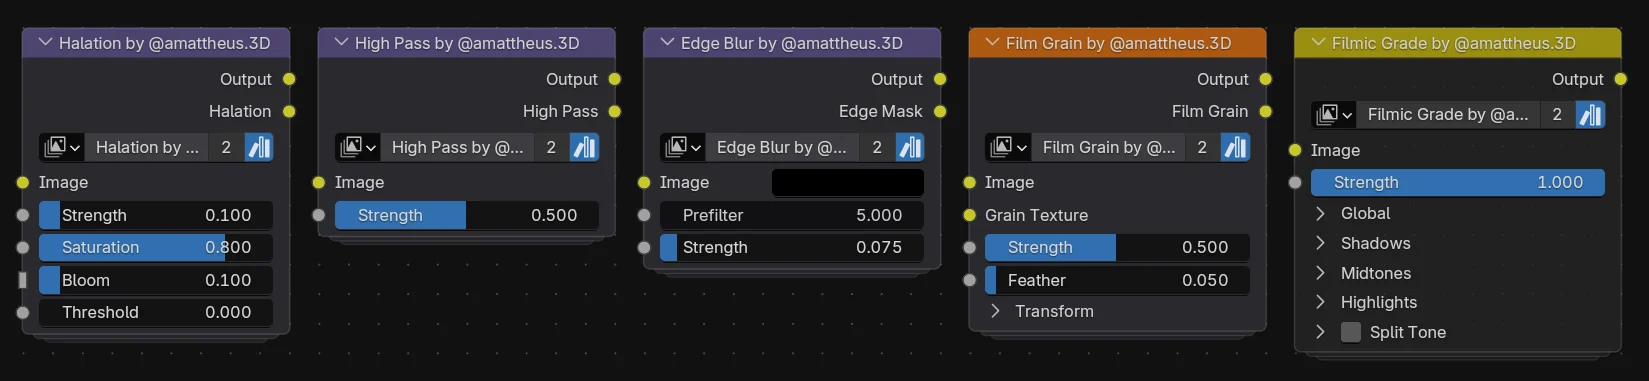
On the film side, the nodes focus on how the image is recorded and processed. Effects like halation, grain, edge blur, and color grading are used to shape the final look.
Rather than relying on a single dominant effect, Aidan explained that the goal is to keep each contribution subtle. The final image comes from how these effects build on top of each other.
He pointed out that lens dirt ended up being one of the most impactful elements when used in the right context. At the same time, effects like halation and filmic grading stood out for different reasons. Halation adds a type of glow that isn’t commonly reproduced in Blender, while the grading node makes it easier to handle color adjustments directly inside the compositor.
Super-Nodes
The system brings these effects together into two main “super-nodes,” each acting as a single control point for multiple internal nodes.
Instead of adjusting every effect individually in the node tree, most parameters are exposed through sliders and toggles. This makes it easier to tweak or turn off effects without digging through the full setup.
The parameters are organized in the same order that the effects are applied, so changes behave consistently as you work through the image.
The system can also output individual passes for each effect, which is useful if you want to preview or recomposite results outside Blender.
Performance and Setup
Even with multiple effects active, the system runs in real time. Aidan mentioned that the main super-nodes update in around 10ms in lighter configurations, while more complex effects like fog glow increase that cost. Performance mostly depends on which effects are enabled and how they’re configured.
The nodes are packaged as assets and can be added through Blender’s asset library or appended directly into a project file. Once imported, they can be used right away without much setup.
What’s Next
Aidan shared a few areas he’d like to improve in future versions. One of them is the horizontal dispersion effect, which currently doesn’t behave exactly as intended. The goal is to make its strength respond more naturally across the image, similar to how radial dispersion works.
Another area is resolution consistency. Right now, some effects can behave differently depending on the render size, and improving that would make the system more reliable across different outputs.
Looking ahead, he’s also interested in expanding the system with features like aperture-based controls that use depth data, as well as more specific film presets instead of a general film look.
If you’d like to see more from Aidan Mattheus, below are their social profiles where they share updates and new work.
- Lens + Film Emulation v2: https://amattheus3d.gumroad.com/l/LensFilmEmulation
- Instagram: https://www.instagram.com/amattheus.3d/
- ArtStation: https://www.artstation.com/aidanmattheus
Interested in learning more?
If you’re interested in shaders in Godot and building tools in Blender, the Godot Shaders & Blender Tools Bundle covers both. It includes The Godot Shaders Bible and Blender Tool Development Fundamentals, focusing on practical examples and real use cases.
Godot Shaders + Blender Tool Development! Check out this indie bundle 🔥 https://t.co/zSlHDCuGVC#b3d #GODOT #indiedev pic.twitter.com/DbX1ZDLiSd
— Shaders Bible Series (@ushadersbible) March 9, 2026
Jettelly wishes you success in your professional career!
Did you find an error? No worries!
Write to us at [email protected], and we'll fix it!
Other posts that might interest you.
-
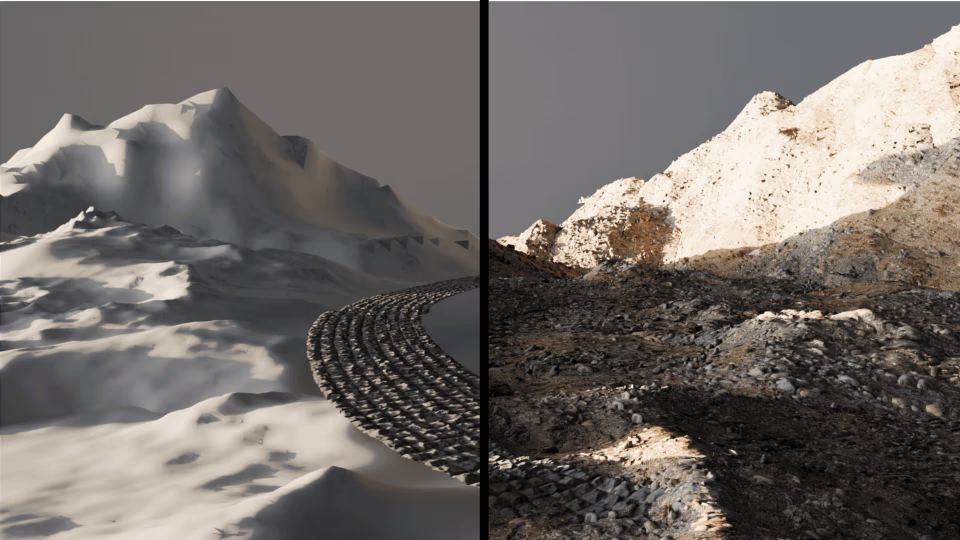 We cover some features of Mesh Wrap, a free Blender add-on by KIRI Engine, designed for wrapping terrain and scan-based meshes.
 -
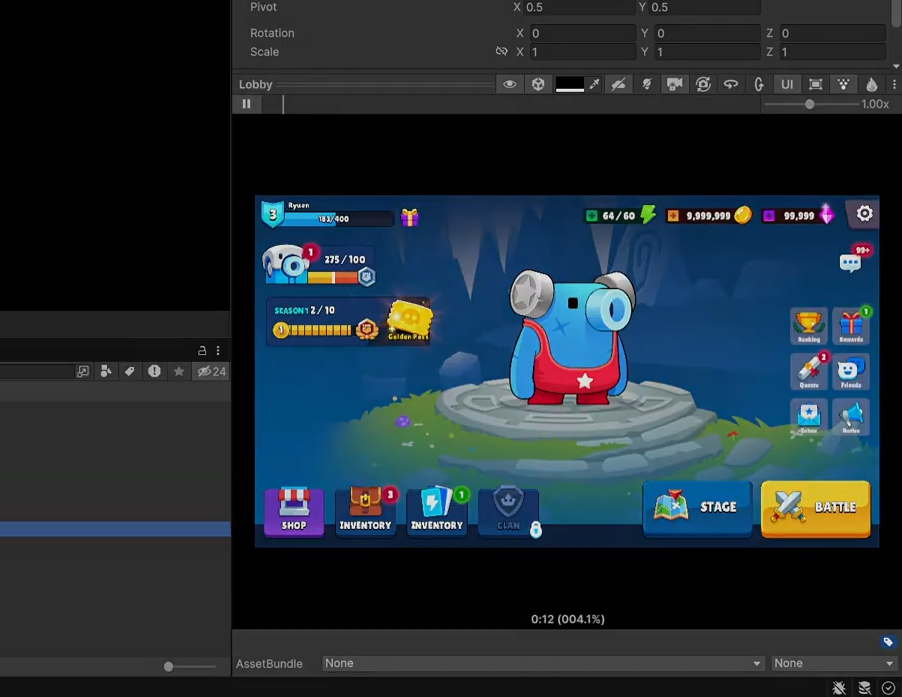 Is Unity’s preview window too limited? We cover Ultimate Preview Window by VoxelLabs, an editor tool that replaces the default preview UI.
 -
 We break down the latest snapshots and updates that are building towards the upcoming Godot 4.6 RC.
